CIS 033
Mission College Robotics Class Fall 2019
Final Project
Dave Goeke
December 9, 2019
Make a computing cluster from
two Raspberry Pi computers
I have read about people making massive clusters with thousands of
Pis, and others with two or four. The CIS-033 class presented the
opportunity to see if I could learn to make and test a small
cluster. In this paper is a description of what I did, lessons
learned, problems, workarounds, and finally some programs to test
clustering.
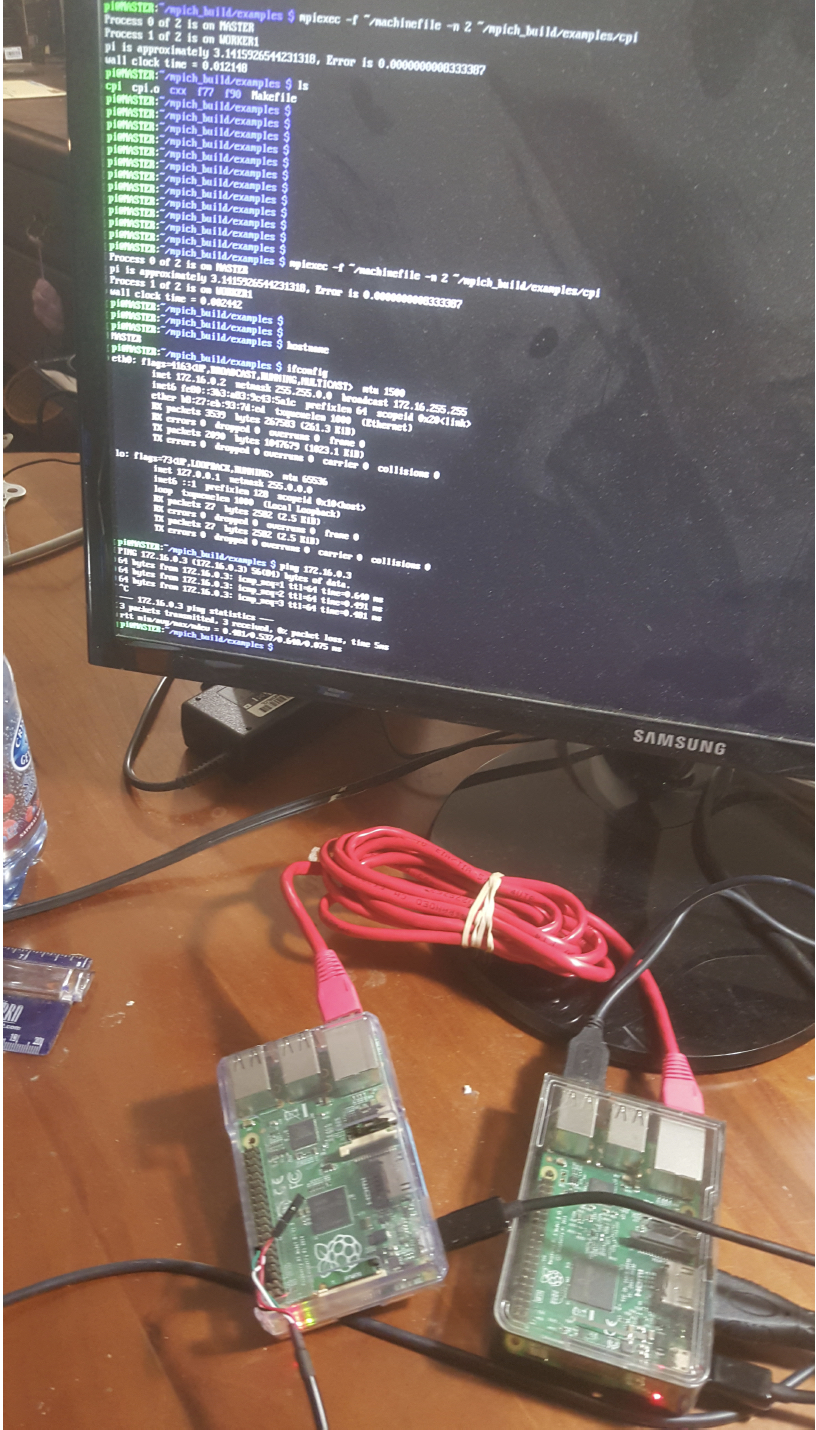
The picture below shows two Pi computers
in a cluster, wired to communicate with each other via wired
ethernet over a crossover cable. The screen shows execution of a
test program to compute pi to 24 digits on
the two computers.
Install OS on SD Card
I have two old Raspberry Pi 3 Model B V 1.2 computers. One has
working WiFi. The only SD cards I have are 64GB which are
problematic according to various web sites including the Pi site.
Using the SD Card Formatter and Balena Etcher, programs to format
the SD card and copy Raspian on to the card, resulted in an image
that was not bootable. Various experiments on my Mac and Linux
system were equally unsuccessful. Finally I formatted the cards
using an Andriod phone of all things, which created a 28 GB FAT32
partition that I could put Raspian on to and boot from.
There are too many sites, documents, and videos available on the
web explaining how to make a cluster. After several time-consuming
experiments I settled on a circa 2012 procedure document from the
University of Southampton in the U.K. which seemed appropriately
academic and explained clearly enough how to use verification
programs that would adequately demonstrate how to test a cluster
once built.
I pulled down the latest copy of Raspian, with a build date of
9/29/2019, The Raspian installation program has options to update
the OS with all latest maintenance during installation and
configuration. This process seemed to take hours, and a simple
line-mode apt-get install update accomplished the same objectives
in less than ten minutes.
Networking Issues
One of Pi boards had a working WiFi interface, giving it two
working network interfaces. During maintenance and tests this
seemed to confuse Raspian and the test programs, so I had to
“down” one of the interfaces, depending on whether I was testing
the cluster or downloading maintenance updates. The documentation
is also confusing on how to configure a static IP on the wired
ethernet but I got it working with updates to /etc/ dhcpcd.conf,
/etc/network/interfaces, and /boot/config.txt. Since there are
only two computers in the cluster I wired them together directly
through a cross-over cable. More than two Pis would have required
a switch.
Using MPICH
Clustering seems to be an established practice and the add-ons
consisted mostly of a package called mpich, an open-source
implementation of Message Processing Interface. It is a standard
message-passing tool for distributed memory applications in
parallel computing. It also required installation of GNU Fortran.
Mpich comes with a suite of test and verification programs to
prove the cluster is working.
Configuration and Setup
- Install mpich and gnu fortran.
- Create mpich “machine” file identifying all
hosts by IP that participate in the cluster.
- Set static IP on wired ethernet interface. I
used a 172.16.x.x network because the home wireless network is
192.168.0.x
- Set DHCP on the wireless interface of the
computer that had it working.
- Enable SSH. Generate keys. Enable SSH login,
scp, and sftp on each host. Create authorized keys file on
each host.
- Boot to command line mode and not GUI
One of the Pi computers had working WiFi, allowing access over the
air using SSH, to do configuration, setup, and test execution.
From there, and over a wired interface, it was possible to SSH
into the second Pi to do the same setup and configuration work. I
also used a serial connection from my laptop but the screen is
small and it did not work very well.
Source Documentation
Details are in the attached instruction pages from Southampton
University: http://www.southampton.ac.uk/~sjc/raspberrypi/
pi_supercomputer_southampton_web.pdf. Cloning a 64GB SD card took
a long time so I just installed and configured everything twice
for the two Pi computers
IVP
The installation verification program I used came with version 2
of MPICH. It computes Pi to 21 digits. With both the wired and
wireless interfaces up the devices did not communicate. Would have
to “down” the wireless interfaces for communication over the wire
to work.
Session Log
The session log below shows a serial connection to the “Master” pi
in the cluster from a Mac laptop:
The two devices are queried through mpich
The CPI (compute Pi) program is run using mpich
The wired ethernet interface is queried showing an IP address of
172.16.0.2
The worker Pi is pinged at 172.16.0.3
SandyFreBSDUnix:~ daveg$
SandyFreBSDUnix:~ daveg$ screen /dev/cu.usbserial-1410
pi@MASTER:~$
pi@MASTER:~$ mpiexec -f machinefile -n 2 hostname
MASTER
WORKER1
pi@MASTER:~$ mpiexec -f machinefile -n 2
~/mpich_build/examples/cpi
Process 0 of 2 is on MASTER
Process 1 of 2 is on WORKER1
pi is approximately 3.1415926544231318, Error is
0.0000000008333387 wall clock time = 0.002047
pi@MASTER:~$
pi@MASTER:~$ ifconfig eth0
eth0:
flags=4163<UP,BROADCAST,RUNNING,MULTICAST>
mtu 1500
inet
172.16.0.2 netmask 255.255.0.0 broadcast 172.16.255.255
inet6
fe80::3b3:a83:9c43:5a1c prefixlen 64 scopeid
0x20<link>
ether
b8:27:eb:93:7d:ed txqueuelen 1000 (Ethernet)
RX
packets 384 bytes 34441 (33.6 KiB)
RX
errors 0 dropped 0 overruns 0 frame 0
TX
packets 333 bytes 44838 (43.7 KiB)
TX
errors 0 dropped 0 overruns 0 carrier 0 collisions 0
pi@MASTER:~$ ping 172.16.0.3
PING 172.16.0.3 (172.16.0.3) 56(84) bytes of data. 64 bytes
from 172.16.0.3: icmp_seq=1 ttl=64 time=0.583 ms
64 bytes from 172.16.0.3: icmp_seq=2 ttl=64 time=0.488 ms
64 bytes from 172.16.0.3: icmp_seq=3 ttl=64 time=0.441 ms
64 bytes from 172.16.0.3: icmp_seq=4 ttl=64 time=0.481 ms
^C
--- 172.16.0.3 ping statistics ---
4 packets transmitted, 4 received, 0% packet loss, time 122ms
rtt min/avg/max/mdev = 0.441/0.498/0.583/0.054 ms
pi@MASTER:~$